
A little something extra for Christmas

It’s not long now chaps!! Can’t believe how quick it’s come round this year!! It’s crazy! We literally have a couple of weeks till the big day and less till the little elves in our lives break up from school too!! I actually thought I was quite organised this year! My shopping list has been getting relatively smaller over the past few weeks. I had quite a big blast in October just before our two little one’s birthdays. I think because their birthdays are only two days apart and kind of near to Christmas, I had a big splurge on getting everything. But the to do list of making, still seems to be rather large! I’m not sure how, but recently things have been added which wasn’t the plan at all!! So starting to get a little bit panicky about it all! I know I will get it all finished in the end, but my time to finish things is getting smaller and smaller. There is definitely a need to prioritise now! Do I get things finished first that will be quick or do I finish the big jobs first?!? It’s a tough one! This is when I wish I had started everything a lot earlier in the year! I say it every year, but I never do. It always seems to catch me out for some reason!
So thinking about presents and things, I realised I needed to make some decorations to give to people. I love giving presents and especially crocheted ones. But it’s also nice to add a little crocheted present onto something else.
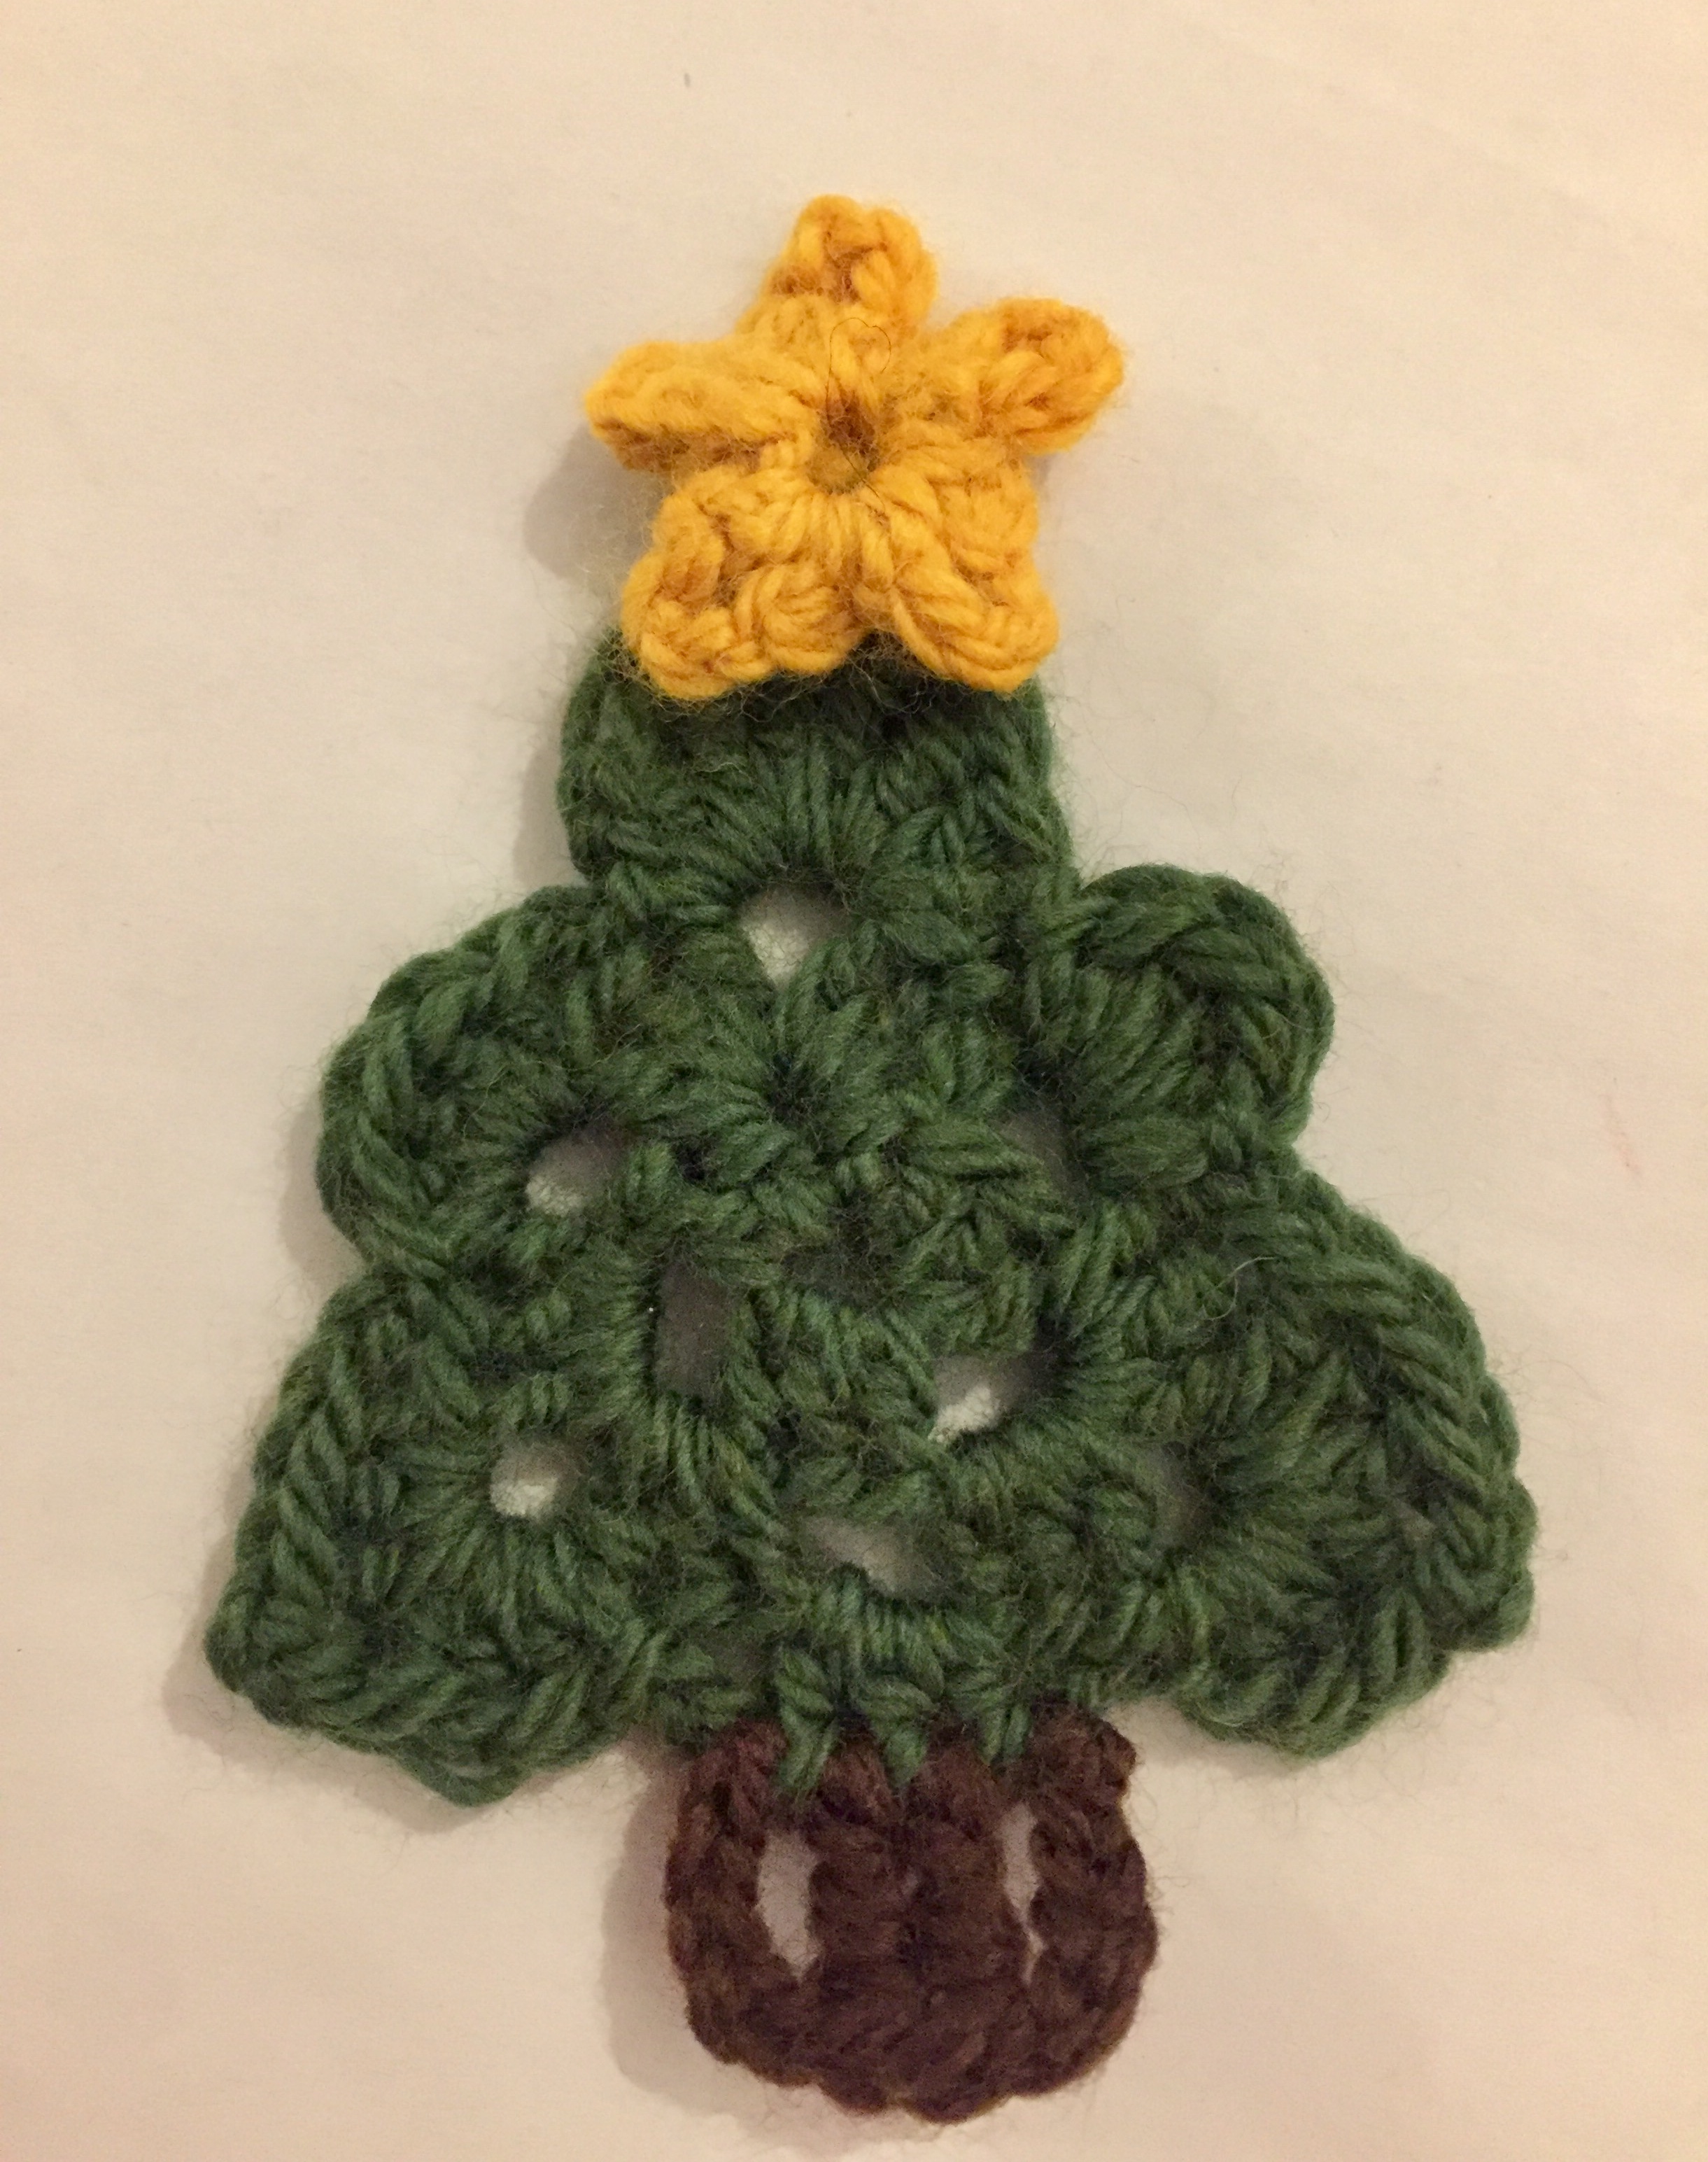
Now I’ve seen lots of different crocheted christmas tree decorations in my time. Some fat ones, some tall ones and some with lots of layers. But not really one that was flat & used simple treble stitches. So I had a little play and this is what I came up with. It’s so much fun making up a new pattern. My only problem is how messy my scribbles are, when writing down the pattern. I wish I was neater, but I’m usually frantically scribbling it down, before I forget or trying to change what I’ve written as the pattern hasn’t worked!

Now as this is a little bit of a long winded pattern, with quite a few stitches, I haven’t included a photo for each part. As I think it would be a little bit crazy to follow and I’m sure you guys would get sick of the same thing!! So I’ve just included photos for each stage. Now if you do find you get stuck, please don’t hesitate to shout and I can show you what I mean.
Stitches –
(Don’t forget that all the stitches on pipsrainbow are using the UK crocheting terminology. If you need help translating them to American, then just let me know.)
Magic Ring (mr) – For a magic ring, make a loop with the yarn, leaving a tail. (Make sure the tail is under the working yarn.) Now insert your hook into the loop, from the front to the back. Wrap the working yarn around your hook and pull the yarn through and pull tight to create a ring.
Slip stitch (ss) – This is where there is no height to the stitch. It’s usually used to join rounds. So insert the hook into the front of the stitch you are joining to. This is usually into the first stitch you made in that round/row. So yarn over hook and pull through that first stitch then also through the loop on your hook.
Chain (ch) – To make a chain, place the yarn over the hook then pull it through the loop on your hook.
Double Crochet (dc) – To make a double crochet, insert hook through your stitch/space, yarn over hook and pull through the stitch. You should have 2 loops on your hook, now yarn over hook and pull through both loops on your hook.
Treble (tr) – To make a treble crochet, firstly yarn over your hook, insert through space/stitch, yarn over your hook, pull back through space/stitch. There should now be 3 loops on your hook. Then yarn over hook and pull through the first two loops, yarn over hook and pull through the last two loops.
Half treble (htr) – A half treble crochet is basically one less movement than a treble. So yarn over hook, insert through space/stitch, yarn over hook, pull back through space/stitch. There should be 3 loops on your hook. Then yarn over hook and pull through all 3 loops.
Double treble (dtr) – A double treble is quite a tall stitch. So yarn over hook twice, insert hook through the stitch/space and then yarn over hook again. Now pull the yarn through the stitch. There will now be 4 loops on the hook. Now place the yarn over the hook and pull through the first 2 loops. Then yarn over the hook again and pull through the next two loops. Haha, now place the yarn over the hook again and pull through the last 2 loops. Phew! It’s a bit of a long process, but a lovely stitch with the height that it gives.
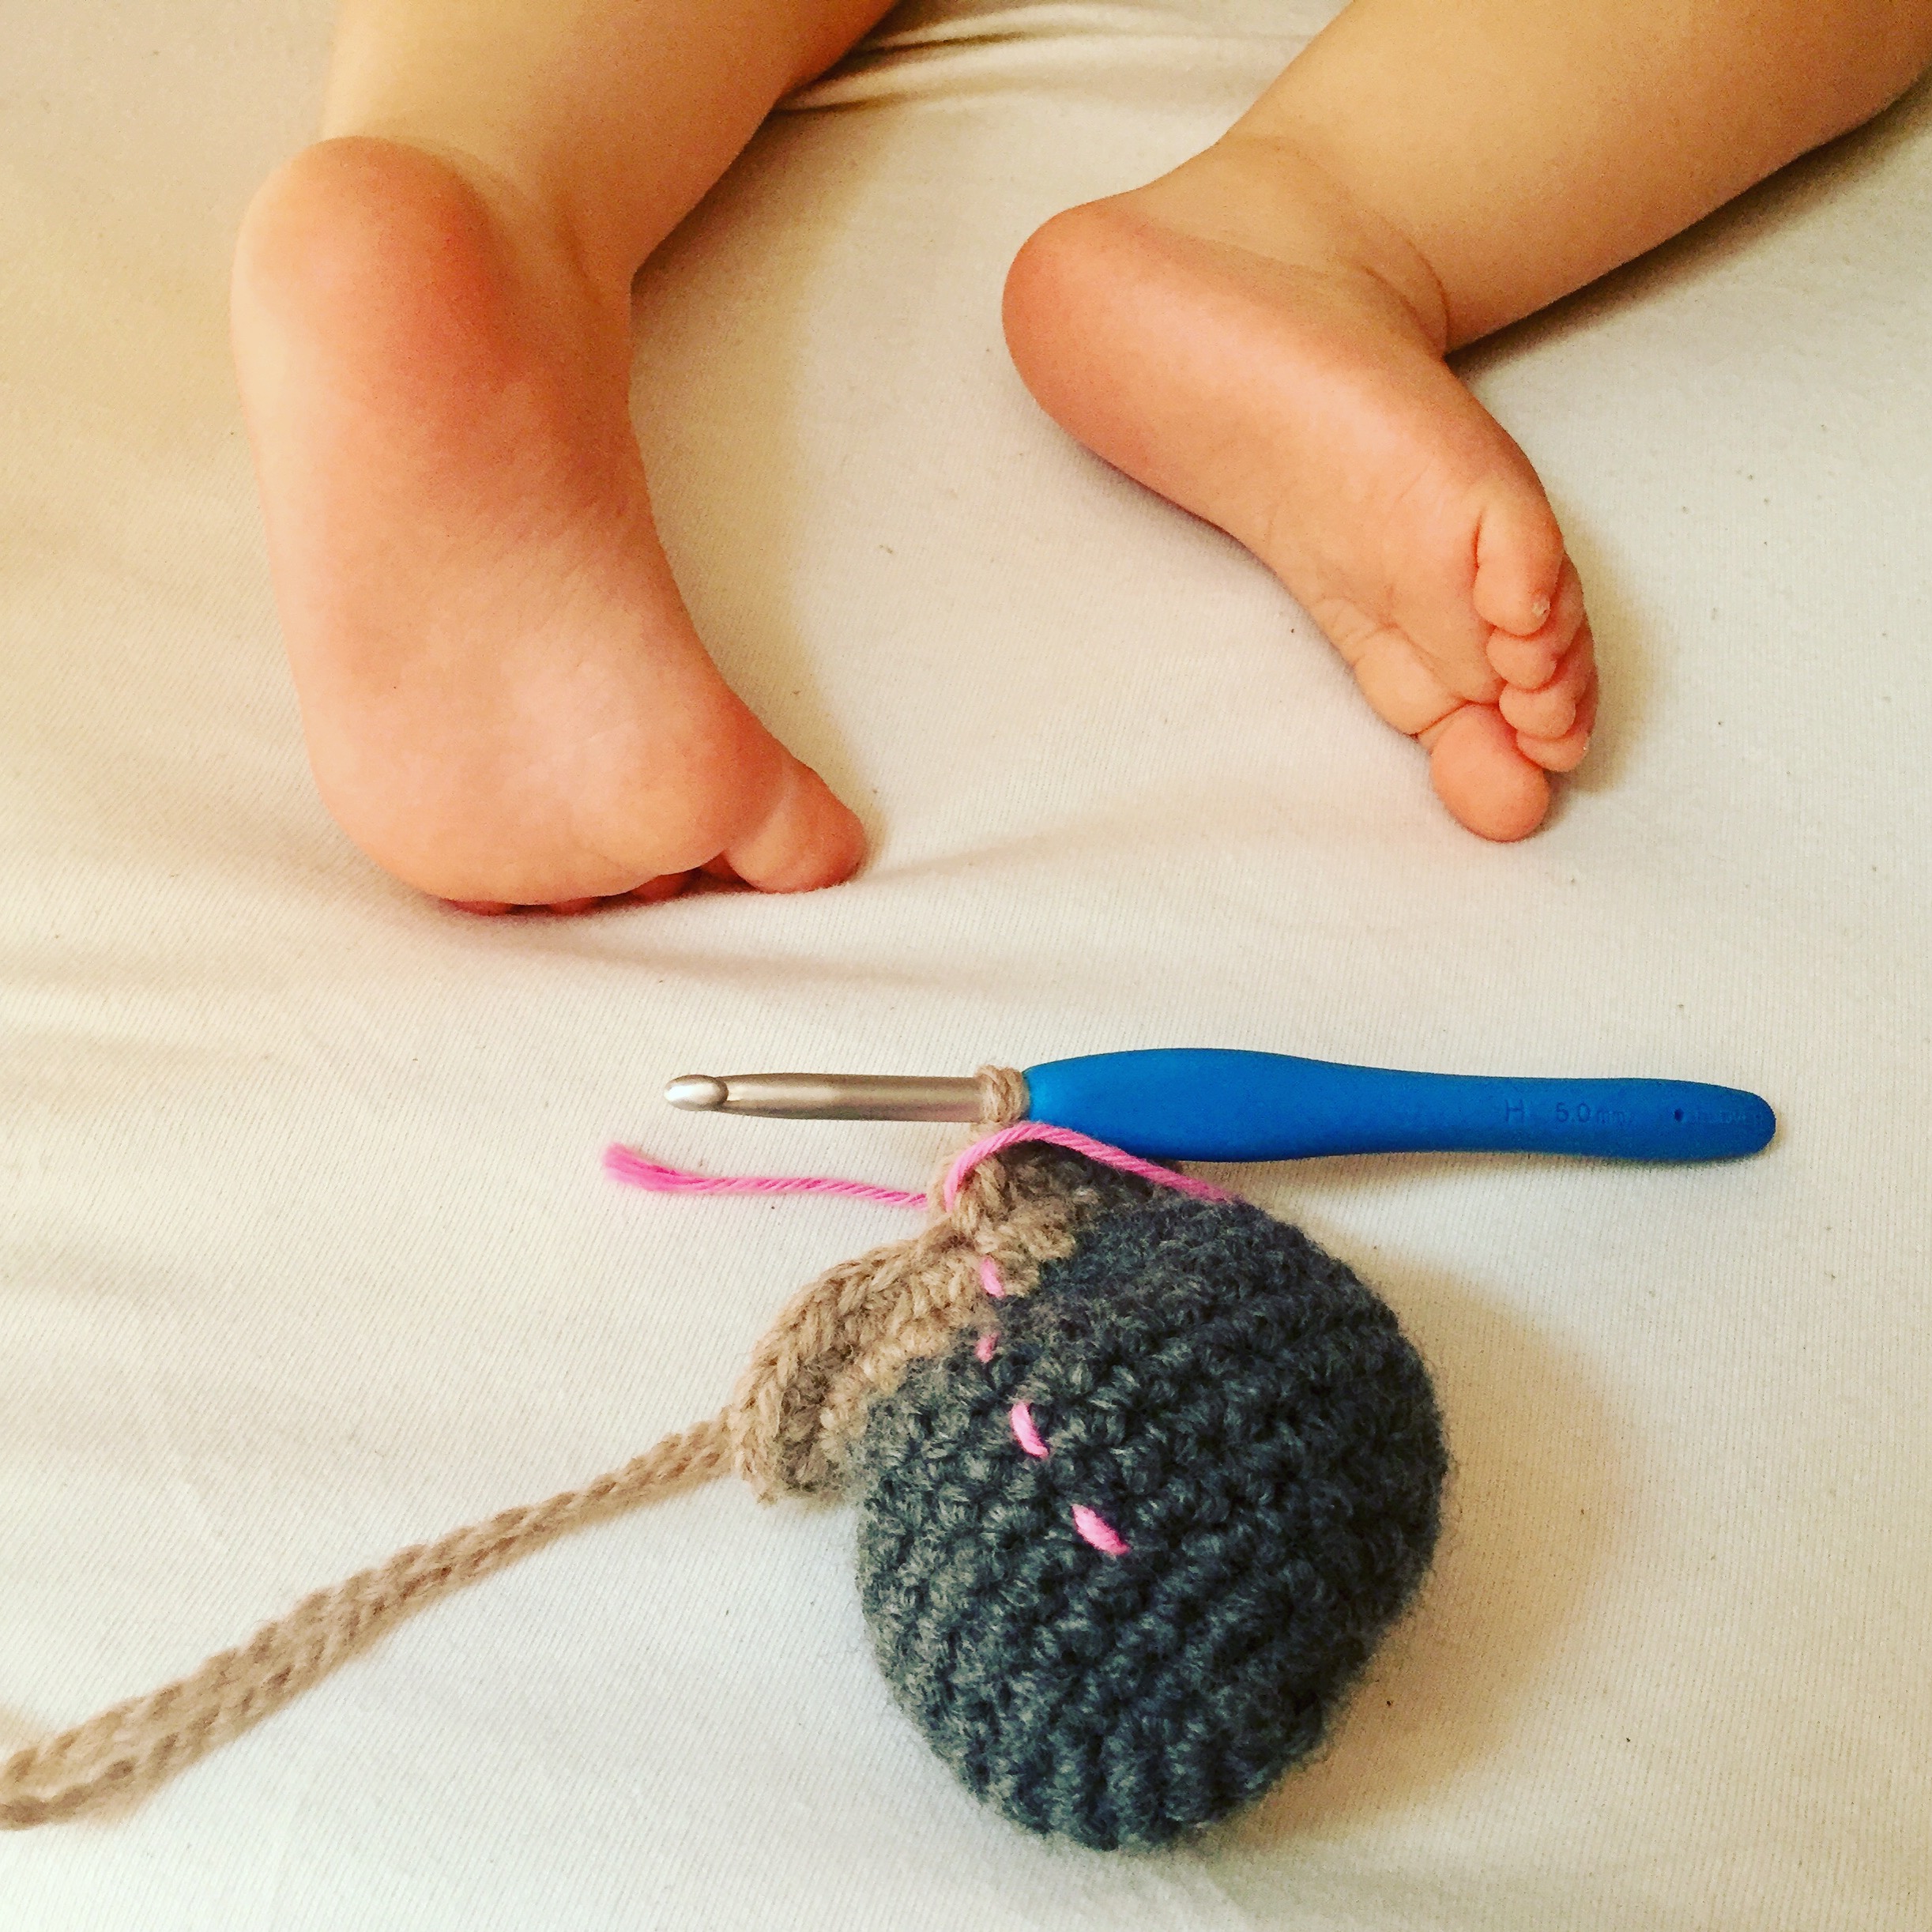
Using multiply strands of yarn – when I use more than one ball of yarn together I literally just grab the two or three ends of each ball and place them together in between my fingers. Then start crocheting as if they are one. The photo below is showing you 2 strands of dk yarn in a magic ring.

Supplies –
My little tree shown above is made with multi strands of yarn. So it uses a ball of cotton dk and a ball of wool dk in the colours of yellow, green and brown. So you will need a 7mm crochet hook, blunt ended tapestry needles and some scissors.

You can also make my little tree smaller, by just using one strand of dk wool. So again you will just need wool or cotton dk yarn in yellow, green and brown and you can use a 4mm hook. (The pattern below is using one strand of dk wool.)

So here we go 😁…
The tree itself.
1 – Make a magic ring and chain 3 into the ring. Now treble (tr) x 2, chain 3, tr x 3, chain 3, tr x 3 and then slip stitch (ss) into the original chain and pull the non working yarn to pull the ring together.

2 – Now for the next round chain 1, tr x 3 into the space, chain 3, tr x 3 into the same space, chain 1, tr x 3 into the next space, chain 3, tr x 3 into same space, chain 1, tr x 3 into the next space, chain 3, tr x 3 into same space, chain 1 then ss into the original chain.

3 – This is the start of the last round. So chain 2, ss into next space, chain 2, tr, dtr x 2, chain 3, dtr x 2, tr, chain 2 and slip stitch into the same space.

4 – Now chain 2 and work tr x 4 into the next space, then ss into the same space.

5 – Ok so now chain 2 and work tr x 3 into the next space, chain 3, tr x 3 into the same space, then ss into the same space.

6 – Now for the base of the tree chain 2, then work htr x 3 into the next space, then chain 2. Now ss into the next space.

7 – This is the other side of the tree now, so work tr x 3 into next space, chain 3, tr x 3 into the same space. Then chain 2 and ss into next space.

8 – For the last space work tr x 4, then ss into same space, then ss into the original chain, fasten off and weave in the two ends.

And there you have it. The branches of a little Christmas tree.

Now for the trunk.
Turn your tree so that the top of the tree faces down and locate the 4 centre stitches of the base you previously created. Now make a slip knot on your hook with the new brown yarn and take the yarn off your hook. Now push your hook through the first of the 4 stitches, place the slip knot back onto your hook, pull the non working yarn tight, then pull back through the stitch.

Now chain 5 which will give you the height for the next stitches.

Now in the next stitch, dtr, then dtr again in the next stitch. Now finish the trunk by working chain 5 and ss into the next stitch, fasten off and weave in ends.

Now every tree needs a star.
Magic ring, *chain 1, htr, chain 3, htr and slip stitch into the ring*. Repeat ** 4 more times then fasten off.

To finish off, pull the non working yarn tail tight to pull the ring closes and creates the star.

Don’t forget to use the ends to attach the star to the top of the tree by using a blunt ended tapestry needle then weave them in. And there you have it!

I hope you enjoy making these as much as I have. They are so quick and easy to make and lovely to add that little bit of something extra to someone’s Christmas.
Wishing everyone the best of luck for the next weeks finishing, crocheting, buying, decorating, writing & posting duties. It’ll all be worth it on the 25th!!
Don’t forget I am always here if you need any help with anything.
Happy hooking everyone.
🌈 xx


