
Slipper Socks

Well here it is. I am so excited to share this with you. My very own slipper sock pattern.

I decided it was rather apt that I make my own slipper socks for the photographic tutorial in the beautiful rainbow coloured Aran yarn from West Yorkshire Spinners!!
So these slipper socks are designed to be worn over socks or barefeet, but you probably couldn’t wear them in a shoe. They are extremely warm and should wear well because of the super mix of nylon and wool in the sock yarn. It’s really important to use sock yarn for this, as it’s so hard wearing. You wouldn’t want them to wear away after usage!!! Can you imagine how upsetting that would be!! Now I am giving you the pattern in the sizes small, medium, large and extra large.
Small is a size 3-5
Medium is a 6-8
Large is an 9-11
Extra large 12-13.
These are comparative with UK shoe sizes. Now I have written the pattern for all 4 sizes, but indicated how many stitches for each size. So in the instructions you will see something like this – (10)(12) So basically the first number in the brackets indicates how many stitches for the Small and Medium size and the last number in the brackets indicates how many stitches for the Large and Extra Large size. All the Large and extra large stitches will be written in bold too, to make it a little easier for you to remember. I will clearly state where there are extra rows and different amount of stitches needed between the 4 different sizes within the pattern.
Now the photographs below are from mine which are a meduim pair of slipper socks. I hope is all making sense so far and that you enjoy the pattern. As you are using aran yarn, it is extremely quick to make up. I managed to make a pair in 2 evenings once for my sister. The one thing I would recommend is to make both slippers at the same time. This means you keep the same tension and also you don’t have that dreaded second sock feeling when you’ve finished the first!!

Stitches –
Slip stitch (ss) – This is where there is no height to the stitch. It’s usually used to join rounds. So insert the hook into the front of the stitch you are joining to. This is usually the first stitch you made in that round/row. So yarn over hook and pull through that first stitch then also through the loop on your hook.
Chain (ch) – To make a chain, place the yarn over the hook then pull it through the loop on your hook.
Double Crochet (dc) – To make a double crochet, insert hook through your stitch/space, yarn over hook and pull through the stitch. You should have 2 loops on your hook, now yarn over hook and pull through both loops on your hook.
Treble (tr) – To make a treble crochet, firstly yarn over your hook, insert through space/stitch, yarn over your hook, pull back through space/stitch. There should now be 3 loops on your hook. Then yarn over hook and pull through the first two loops, yarn over hook and pull through the last two loops.

Supplies –
Ok, so you will need two balls of Aran sock yarn. I have used the incredible West Yorkshire Spinners yarn, which is so amazing to work with. But basically you need to use sock yarn which has a mix of 75% wool and 25% nylon. You will also need a 6mm and a 6.5mm hook. Also some scissors, a blunt ended tapestry needle and some little stitch markers – the little clip form and some extra yarn too for a yarn stitch marker.

As we are going to use two balls of sock wool to make the slipper socks, you need to make sure that the batch number is the same. As it is a natural product that has been dyed, there maybe a slight colour difference in the batches. So it’s always important to check.

When you’re using self striping yarn like the WYS Aran yarn, you need to make sure that you try to start at the same place in the yarns colour swop. Otherwise you could have two slipper socks looking slightly odd. So to do this, use one ball as your starting point and simply match the other ball to it. I only discarded a bit of yarn to make them match and you can always use this for yarn stitch markers in other projects. Can you see in the photo – I have matched the yarn just after a colour change, so that it is exactly the same amount of the second colour.

You can always make your slippers in solid colours or even make up your own stripes with two or three colours. I’ve already had an order for some red, blue and white ones! Really hope you like the pattern and become utterly addicted in making them, like me!
Hmm, they seem to be growing!!

Ok so here we go …
Toe –
– So start off with your 6mm hook and chain (10) (12).

Now work 1dc into the 2nd chain from the hook. (If you are unsure, it’s where the needle is pointing to!)


Then work 1dc into the rest of the (9)(11) chain stitches.

Now place your stitch marker into the last stitch, so you know where the (9)(11) stitches ends.

You are now going to be working on the other side of the (9)(11) chain stitches. So find the first chain stitch. (This is where the needle is.)

Ok so now work 1dc into each of the (9)(11) chain stitches. Then place a stitch marker in the last stitch, so you know where the round ends. You should now have (18)(22) stitches.

– Ok so in this round we are going to start increasing. So start by working 2dc stitches into the first stitch.

Then work 1dc in the next (6)(8) stitches.

Then work 2dc into the next stitch. And then in the last stitch, where the stitch marker is, work 1dc. Move your stitch marker into this stitch.

So now you are increasing on the other side. So work 2dc into the next stitch.

Then work 1dc into the next (6)(8) stitches.

And then work 2dc into the next stitch and then work 1dc into the last stitch where the stitch marker is. This completes round 2. (22)(26)

– Right so we are going to increase in this round too. So work 2dc into the first stitch.

Then 1dc into the next (8)(10) stitches, then 2dc into the next stitch.

Finally work 1dc into the last stitch where the stitch marker is. Don’t forget to move the stitch marker again.

Then work 2dc into the next stitch, 1dc into the next (8)(10) stitches, then 2dc into the next stitch.

Finally work 1dc into the last stitch where the stitch marker is. Don’t forget to move the stitch marker again. This completes the round. (26)(30)

– Ok so in this round, work 1dc into each stitch. (26)(30)

– We are now going to increase again. So in the next stitch work 2dc in the same stitch, 1dc x (10)(12), 2dc in the same stitch, 1dc and move your marker, 2dc in the same stitch, 1dc x (10)(12), 2dc in the same stitch, 1dc. (30)(34)

Remove both stitch markers and replace the one nearest your hook with a yarn stitch marker. (It’s just easier to count when your crocheting quite a few rounds.)

– You also need to change your hook to a 6.5mm hook.
So for the Small size work 14 rows of 1dc in each stitch. (30)
For the Medium size work 16 rows of 1dc in each stitch. (30)
For the Large size work 20 rows of 1dc in each stitch. (34)
For the Extra Large work 22 rows of 1dc in each stitch. (34)

– In this row we are going to increase again. So work 2dc in the same stitch, 1dc x (12)(14), 2dc in the same stitch, 1dc, 2dc in the same stitch, 1dc x (12)(14), 2dc in the same stitch, 1dc. (34)(38)

– For the small size work 6 rows of 1dc in each stitch. (34)
For the medium size work 8 rows of 1dc in each. (34)
Large size work 10 rows of 1dc in each. (38)
Extra Large size work 12 rows of 1dc in each (38)

Heel –
Ok so we now have (34)(38) stitches in the round and are ready to start the heel. Now to make the heel we need to get our hook into the correct place. (Basically when you start making the heel, it needs to be in line with the toe.) Ok so to do this by working (6)(4) dc stitches. If we don’t do this, the heel won’t be in line with the toe!! The reason the stitch number here for large and extra large size is smaller is because there are more rounds in these sizes, meaning the stitch marker is works it’s way around more.
– Slip stitch into the next stitch, then chain 1 and work 1dc into the same stitch. Then work 1dc into the next (14)(18) stitches and then 1htr into the next stitch. Place a stitch marker into the first and last stitch. You should now (16)(20) stitches in beginning of your heel.

– Now turn your work and chain 1. Then 1dc in the same stitch and then 1dc into the rest of the heel stitches. (16)(20)

– Ok so for the Small and Medium sizes:
For 8 rows, turn your work, chain 1 and work 1dc into the same stitch and then work 1dc into each stitch except for the last stitch. Leave the last stitch unworked. By the end of these 8 rows, you will only have 8 stitches.
Ok so for the Large and Extra Large sizes:
For 10 rows, turn your work, chain 1 and work 1dc into the same stitch and then work 1dc into each stitch except for the last stitch. Leave the last stitch unworked. By the end of these 10 rows you will only have 10 stitches.
I tend to keep a tally of which row I am on as it’s a bit tricky to count your rows at this stage.

– Now turn your work and chain 1, then 1dc in the same stitch. The work 1dc into each stitch in the row. (8)(10)

– Turn your work, chain 1 and work 1dc into every stitch in the row. Now this bit it quite hard to explain – so here goes. So you need to slip stitch into side of the row below – this is where the needle is pointing.

Then work 1dc into the last unworked stitch of the row below. You can see in the photo below where the needle is pointing to the unworked stitch. (10)(12)

– Now *turn your work chain 1 and then miss the chain stitch and first dc stitch. Now work 1 dc into the rest of the stitches, then slip stitch into the side of the rows below. Then work 1dc into the last unworked stitch of the row below.* (11)(13) (Sometimes it’s hard to work out where the slip stitch in the side of the row goes, but it’s basically the side of the row just above the unworked stitch.)

– Repeat ** from row above for (9)(9) more rows. When you work the last couple of rows, work the last stitch into the original stitch where the marker is. Don’t worry if you struggle with this bit, it’s a little fiddly. You just need to make sure it’s right at the bottom of the start of the heel, as otherwise you will have a gap when you join the heel back to the foot stitches. You can remove each marker when you get to this stage. You now have (20)(22) in the heel itself.

Leg –
You are now back to the beginning again. Here you need to turn your work. Now place your yarn stitch marker here.

– Now chain 1 and dc into the same stitch. Then work 1dc in the all of the stitches in the heel. (20)(22)

Now you need to find the next proper stitch and work 1 dc into it. I always count backwards from where the stitch marker is at the beginning and count (18)(18) stitches to check where you need to put this first stitch. Again this can be a little fiddly to find, but counting back from the stitch marker should help you to find these stitches. Now if you have a big gap here, you may want to work this gap together. So basically insert you hook into the side of the row, (where the needle is pointing) insert your hook and pull the yarn through. You will have two loops on your hook. Now insert your hook into the first stitch, yarn over your hook and pull through. (3 loops) Now yarn over your hook and pull through all 3 loops. This will close up the space where the heel and the leg attach.

Then work (17)(17) more 1 dc stitches. This will finish the first round. (38) (40)


– So using your yarn stitch marker as your guide, work (14)(16) rounds. (You can do less or more rounds here, depending on how long you want the leg to be.) (38)(40)

– Once you have completed your (14)(16) rounds of dc stitches, slip stitch into the next stitch. (38)(40)

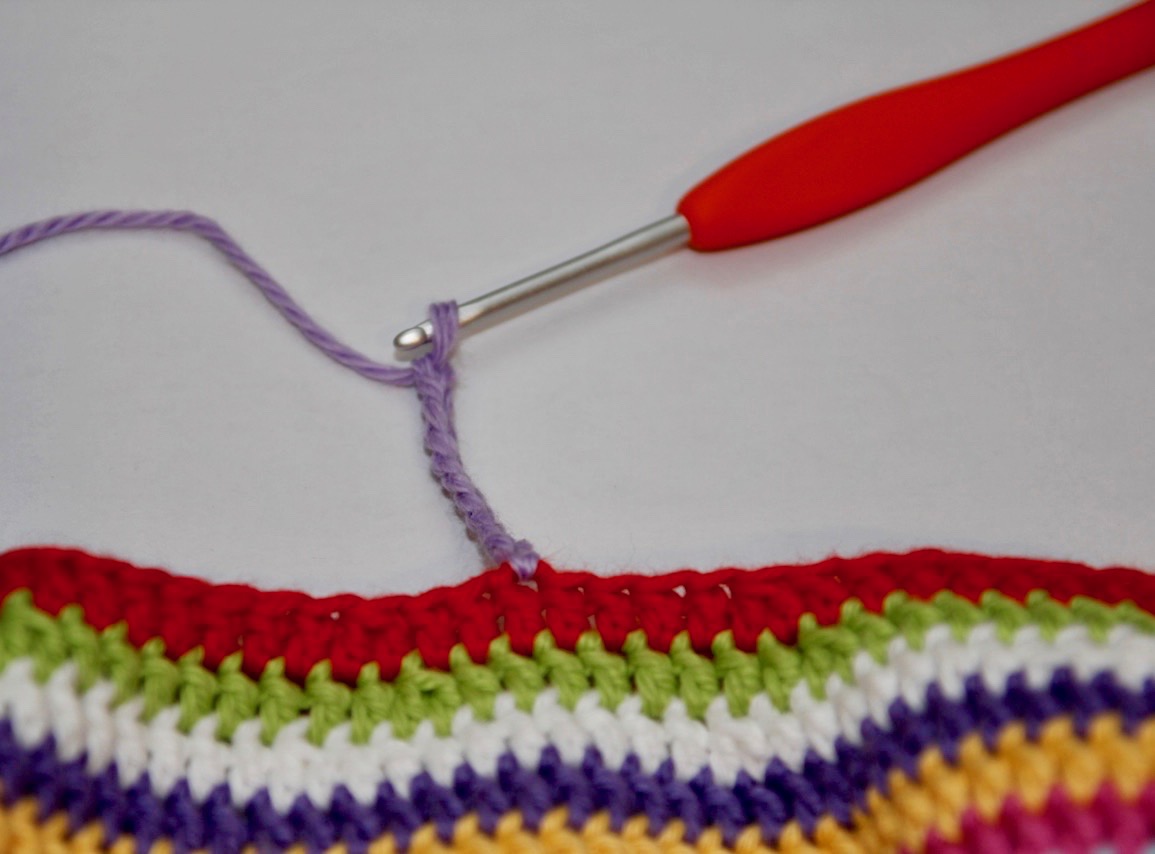
– Ok so for the top bit of the leg you need to change back to your 6mm hook. Then chain 3 (This counts as your first tr.) This will give you the height for a treble crochet.

Now work 1tr in each stitch in the round. (38)(40)

– *Once you get to the stitch marker, slip stitch into the chain 3 space and work 3 chains again. Once again work 1 tr into each stitch in the round.* (38)(40)


– For the last round, *slip stitch into the next stitch, chain 1 (This acts as your first dc) then work 1dc into each stitch. Then slip stitch into the first dc stitch.* (38)(40)
– Now repeat ** from the row above for one more round. Finally fasten off your ends and now sew in your ends. (38)(40)
And there you have it, a pair of slipper socks.

Here’s a few of my families slipper socks. The collection does seem to be growing doesn’t it!


I have already started to create a pattern for children’s feet, so will get that published as soon as I can and also patterns for using dk and 4 ply sock yarn. But this might take me a little longer.
I hope you have enjoyed this pattern. I am so chuffed to be able to share it with you all. My dear Grannie used to make knitted slipper socks and this pattern is based on that concept. I will endeavour to make as many of these for my family, just like my dear dear Grannie did. Here’s to you Gran. Slipper Sock Queen.
Happy hooking everyone.
🌈 Xx


