Master Rudolf

Well it just had to be done, didn’t it. I’ve been wanting to make a reindeer for ages. They are one of those childhood animals that just fills me with joy and the magicalness of Christmas. Don’t you just love them! They seem to have such an air of mystery and grandeur. So one definitely needed to find its way into the PipsRainbow family.
Master Rudolf here, has a rather large round belly and is extremely cuddly. (My lovely sister pointed out, that he has obviously eaten one too many mince pies! 😂) Poor Rudolf! Mince pies and crocheting – now there’s a thought! Right getting back to crocheting, it’s quite a simple pattern using mainly the double crochet stitch. So you will be able to make him up quite quickly. Maybe even sneak one under the tree for a little someone special or let him be found as a new friend on Christmas Eve. Some households have little pyjama elves. Wouldn’t it be magical to have this little guy sitting on top of the pile!
So the pattern is crocheting in the round, so amiguirimi style. So no need to slip stitch and chain for each round, just work in a lovely simple spiral. Don’t forget though, to use your stitch markers to help you – so important. I know a few people now that have got themselves into a pickle, because they thought they could count where they were. If you are anything like me, and you crochet on the hoof, so a stitch marker is the most valuable thing ever!!

As this is a simple spiral pattern, I have kept the post quite simple. With only a few photos where extra help maybe needed. If you are struggling with something, please don’t hesitate to contact me and I can send you photos in full of what you need to do. I think the trickiest bit is the antlers, as you need to split your rounds, but once you have done it a few times it will become second nature.
I have used a variety of photos for this blog post. Some of them are from a dk reindeer and others are from my 2 or 3 dk multi-strand reindeers. So hope they all make sense to you.
Stitches –
Magic Ring (mr) – For a magic ring, make a loop with the yarn, leaving a tail. (Make sure the tail is under the working yarn.) Now insert your hook into the loop, from the front to the back. Wrap the working yarn around your hook and pull the yarn through and pull tight to create a ring.
Slip stitch (ss) – This is where there is no height to the stitch. It’s usually used to join rounds. So insert the hook into the front of the stitch you are joining to. This is usually the first stitch you made in that round/row. So yarn over hook and pull through that first stitch then also through the loop on your hook.
Double Crochet (dc) – Insert the hook through the stitch, front to back, then yarn over hook and pull back through stitch. You will have two loops on your hook. Then yarn over your hook and pull through both loops.
Double Crochet Decrease (2dctog) – This is where you crochet two stitches together to decrease the amount of stitches in the round. So insert the hook through the front of the first stitch only (the front V) and then insert again through the front of the second stitch (the front V). Now yarn over your hook and pull it back through both stitches, so you will then have 2 loops on your hook. Yarn over your hook again and pull through both loops. And there is your 2dctog. (Basically 2 double crochet stitches crocheted together.)
Splitting rounds – This is when you need to split a round to create 2 or more rounds. (In this patterns case – the antlers) First you need to count back the number of stitches that the pattern states, then move the crocheting so the first of these back stitches is in front of you. Now crochet into this stitch from the right side. Complete this first round with the number that the pattern states and fasten off. You will then need to go back to the original stitch and complete the next split round.
Colour change – When changing from one colour to the other, always change on the last stitch on the previous stitch. For the last stitch complete the first part of the stitch – so hook through stitch, yarn over the hook then pull back through. Now instead of using the same yarn, change to the new yarn, yarn over hook and pull through the two loops on your hook. Now you are ready to carry on with the next round in your new yarn.
Supplies –

For all sizes of your reindeer you will need toy stuffing, blunt ended tapestry needle, a small amount of black yarn (for the face), a small amount of red yarn for the nose and also some cream/white for the muzzle. (You can use dk black yarn for any of the sizes of reindeers. As you are only using it for face features and not crocheting with it, you don’t need to change the weight each time.) You also need a small amount of dark brown yarn for the hooves, a 25g ball would be plenty. The main body, face and legs can be in the colour of your choice. Usually a pale brown, beige or grey would be nice for a reindeer.
For a small sized reindeer you will need a 3mm crochet hook with one 100g ball of dk yarn for the main body, head and legs.
A medium sized one, on the other hand, is an Aran weight yarn. So use a 5mm hook with about 200g of the main body colour. Don’t forget, if you are using aran weight, then the red and brown need to be aran weight too. (You could also use 2 dk yarns together which would give you a similar size, but use a 6mm hook.)
A large sized reindeer you would use a chunky weight yarn with an 8mm hook. Now if you don’t want to use chunky weight yarn and you have 3 x 100g balls of similar/same colours then you can make him in a multi strand yarn like I have. So 3 dk strands together. I use a 9mm hook and I think it gives a lovely texture. For my Rudolf, I have used 3 strands of similar coloured dk soft wool.
Don’t forget if you find a stitch or method you are unsure about – you can find a description of them above in the stitches section or on one of the tutorials.
So here we go…
Body – make in your main light brown/grey yarn.
1 – Make a magic ring, chain 1, then dc6 into the ring. Then pull the tail tight to create the first round. (6)

2 – *2dc into each stitch.* Work ** 6 times. (12)
3 – *1dc, then 2dc into each stitch.* Work ** 6 times. (18)
4 – *2dc, then 2dc into each stitch.* Work ** 6 times. (24)
5 – *3dc, then 2dc into each stitch.* Work ** 6 times. (30)
6 – *4dc, then 2dc into each stitch.* Work ** 6 times. (36)

7 – *5dc, then 2dc into each stitch.* Work ** 6 times. (42)
8 – 11 For each round, 1dc in each stitch. (42)
12 – *5dc, then 2dctog*. Work ** 6 times. (See stitches explanation above if you are unsure of 2dctog.) (36)

13 – Work 1dc into each stitch. (36)
14 – *4dc, then 2dctog* Work ** 6 times. (30)
15 – 17 Crochet 1dc into each stitch. (30)
18 – *3dc, then 2dctog. Work ** 6 times. (24)
19 – *6dc, then 2dctog .* Work ** 3 times. (21)
20 – *5dc, then 2dctog.* Work ** 3 times.(18)

21 – *4dc, then 2dctog.* Work ** 3 times.(15)
22 – *3dc, then 2dctog.* Work ** 3 times.(12)
23 – *1dc, then 2dctog.* Work ** 3 times. (9)
Now it’s time to stuff your body with toy stuffing, sew up and fasten off your body using the blunt ended tapestry needle.
Head – start the head in your main light brown colour and move to your cream yarn for the muzzle.

1 – Make a magic ring, chain 1 then, dc6 into the ring. Pull the tail tight to create the ring. (6)
2 – *2dc into each stitch.* Work ** 6 times. (12)
3 – *1dc, then 2dc into each stitch.* Work ** 6 times. (18)
4 – *2dc, then 2dc into each stitch.* Work ** 6 times. (24)
5 – *3dc, then 2dc into each stitch.* Work ** 6 times. (30)
6 – 10 Crochet 1dc in each stitch. (30)
11 – *3dc, then 2dctog.* Work ** 6 times. (24)
12 – *2dc, then 2dctog.* Work ** 6 times. (18)
13 – Change colour to a cream/white in last dc of the previous round then work 1dc into each stitch. (18)

14 – In the next few rounds, you need to follow each stitch carefully. So work 2dctog, 2dc in next 5 stitches, dc, 2dctog, dc, 2dc in next 5 stitches, 2dctog. (25)

15 – 2dctog, 2dctog, 2dc into each stitch x 5, 1dc, 2dctog, 1dc, 2dctog, 1dc, 2dc in each stitch x 5, 2dctog, 2dctog. (29)

16 – Work 2dctog, 2dctog, 2dc, 2dctog, 2dc, 2dctog, 2dctog, 1dc, 2dctog, 2dctog, 2dc, 2dctog, 2dc, 2dctog, 2dctog. (19)
17 – Work 2dctog 9 times, then 1dc. (10)
18 – Work 2dctog 5 times. (5)
Now slip stitch into the next stitch, stuff with toy stuffing and sew up using a blunt ended tapestry needle. You could now attach this to the top of the body if you want to.
Hooves and legs – make 4 hooves using a dark brown yarn, then work the legs in your light brown.

1 – Make a magic ring, chain 1, then dc6 into the ring. (6)
2 – 2dc into each stitch. (12)
3 – 5 Work 1dc into each stitch. (12)
6 – *2dc, 2dctog* Work ** 3 times. (9)
Change colour in last stitch of the previous round to the main light brown colour.
7 – 18 Crochet 1dc into each stitch. (9)

Now slip stitch & fasten off leaving a tail for you to sew the leg onto the body.
Red nose – make 1 and use your red yarn.

1- Make a magic ring, then chain 1 and 6dc into the ring. Then pull the tail tight to create the ring into a round. (6)
2 – *2dc, 2dc into next stitch.* Work ** 2 times. (8)
3 – Work 1dc in each stitch. (8)
4 – Now crochet 2dctog 4 times. (4)
Slip stitch, then fasten off leaving a tail and then sew the nose onto your head. If you want to add a little toy stuffing in the nose then you can.
Ears – make 2 using a light brown yarn.

1 – Make a magic ring, then chain 1 and 4dc into the ring.
2 – Dc into each stitch. (4)
3 – *2dc in each stitch.* Work ** 4 times. (8)
4 – *1dc, then 2dc into next stitch.* Work 4 times. (12)
5 – *1dc, then 2dctog.* Work 4 times. (8)
6 – 1dc into each stitch. (8)
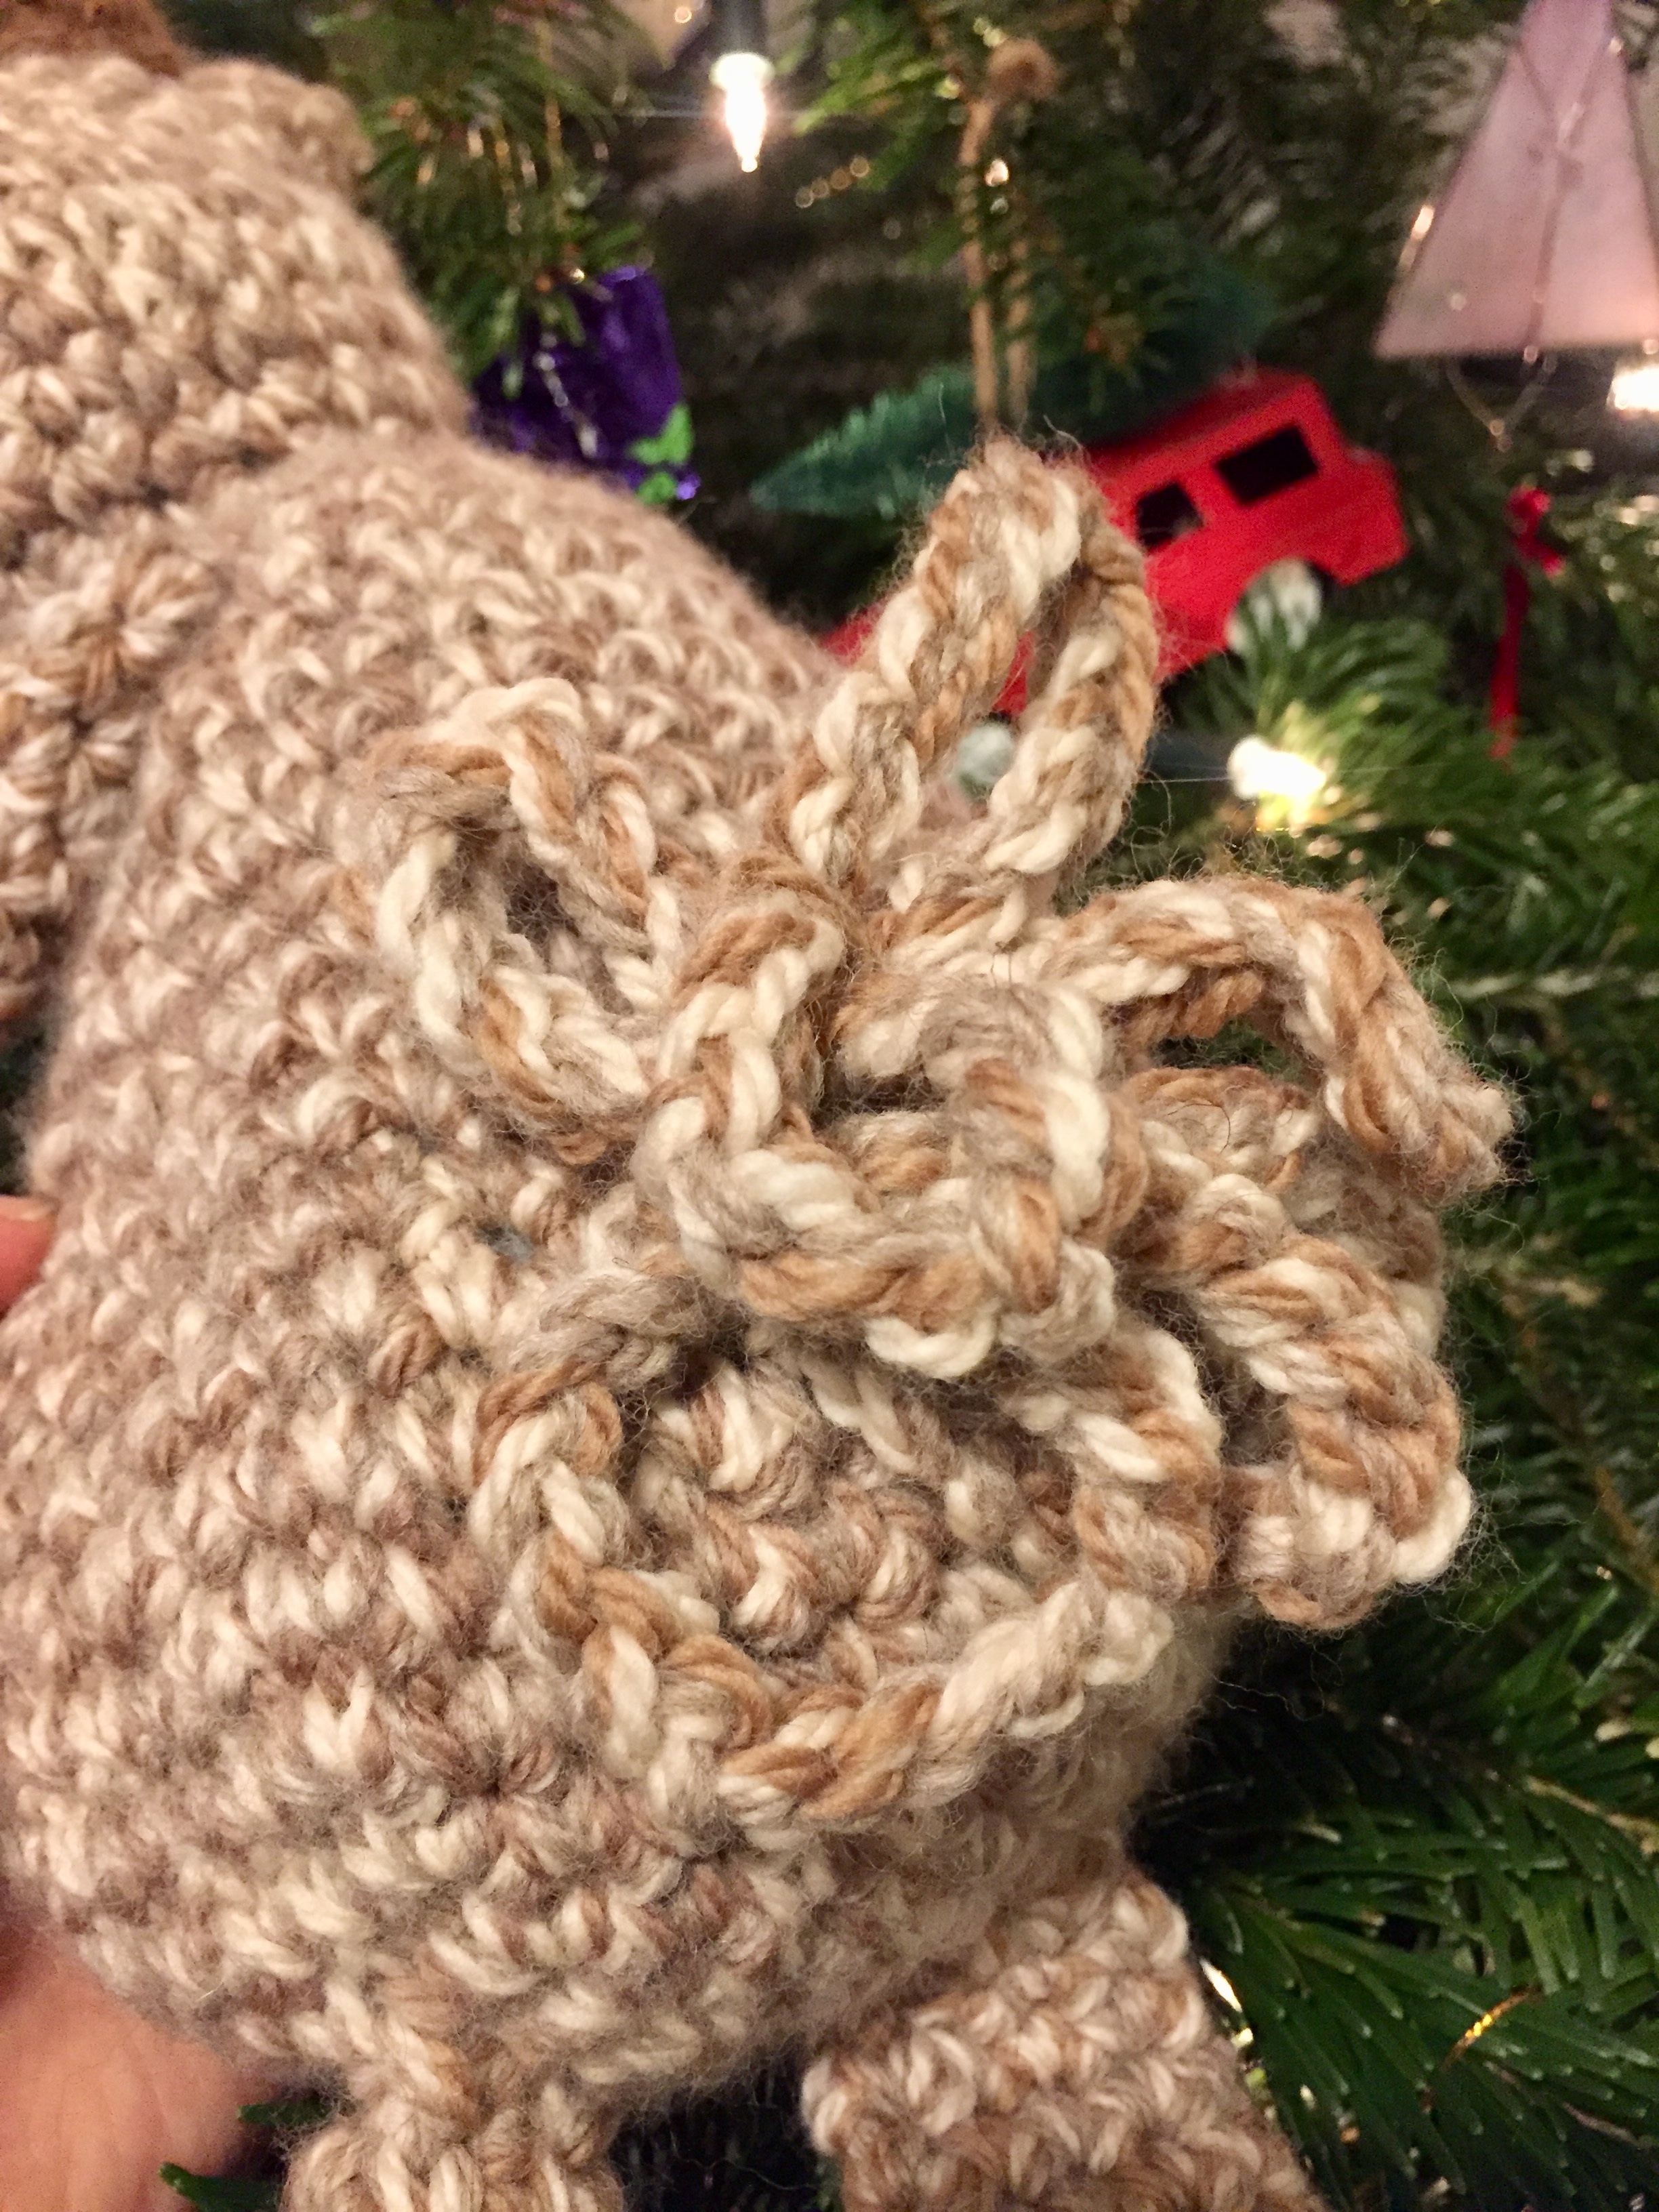
Antlers – make 2 using dark brown yarn.

For the first part of the antler.
1 – Chain 6 & slip stitch into a ring. (6)
2 – 5 Work 1dc into each stitch. (6)

6 – Chain 1 and split the round by counting back 3 stitches. This means with the chain 1 you will have 4 stitches to play with. So 4 stitches will be in this particular round. So you can see below the 4 stitches.

Insert your hook into the first of the 4 stitches. Hope you can see that here!

Then 1dc in each of the 4 stitches. (4)
7 – Then again work 1dc in each of the 4 stitches. (4)

8 – Now crochet 2dctog twice, slip stitch into the next stitch and seal up and fasten off using a tapestry needle. (2)

For the second part of the antler.
1 – Attach your yarn into the original first stitch with a chain then 1dc (there will be 2 double crochet stitches in there then!)

Now work 1dc into next 3 stitches. (4)

2 – Then go back across to your original dc and 1 dc in each stitch again. (4)

3 – Chain 2, then as before split the round by counting back 2 stitches. This will give you 4 stitches as you can see in the picture below. Now crochet 1dc into these 4 stitches. (4)

4 – As before, dc2tog twice to give you 2 stitches, then slip stitch and sew up & fasten off using a blunt ended needle. (2)
For the final part of the antler.
Now the final part is just a little bit more fiddly.
1 – Attach your yarn into the original first stitch with 1 chain, then dc (there will be 2 in there then!)

Then dc into next 3 stitches. (4)

2 – 1dc into each stitch. (4)

3 – Now crochet 2dctog twice, slip stitch and seal up & fasten off. Thread the tail that isn’t left through the antlers to the base, where you will be able to sew the antlers onto the reindeer.

Now it’s time to sew up all your parts together. Some people prefer to pin them in place, before they sew them on, but I just tend to line them up and go for it. Some people find the sewing up bit the hard part, but I think the more little creatures you make, the easier it will become. My husband thinks I’m making a crocheted army. It’s does look a bit like that on playroom sofa!
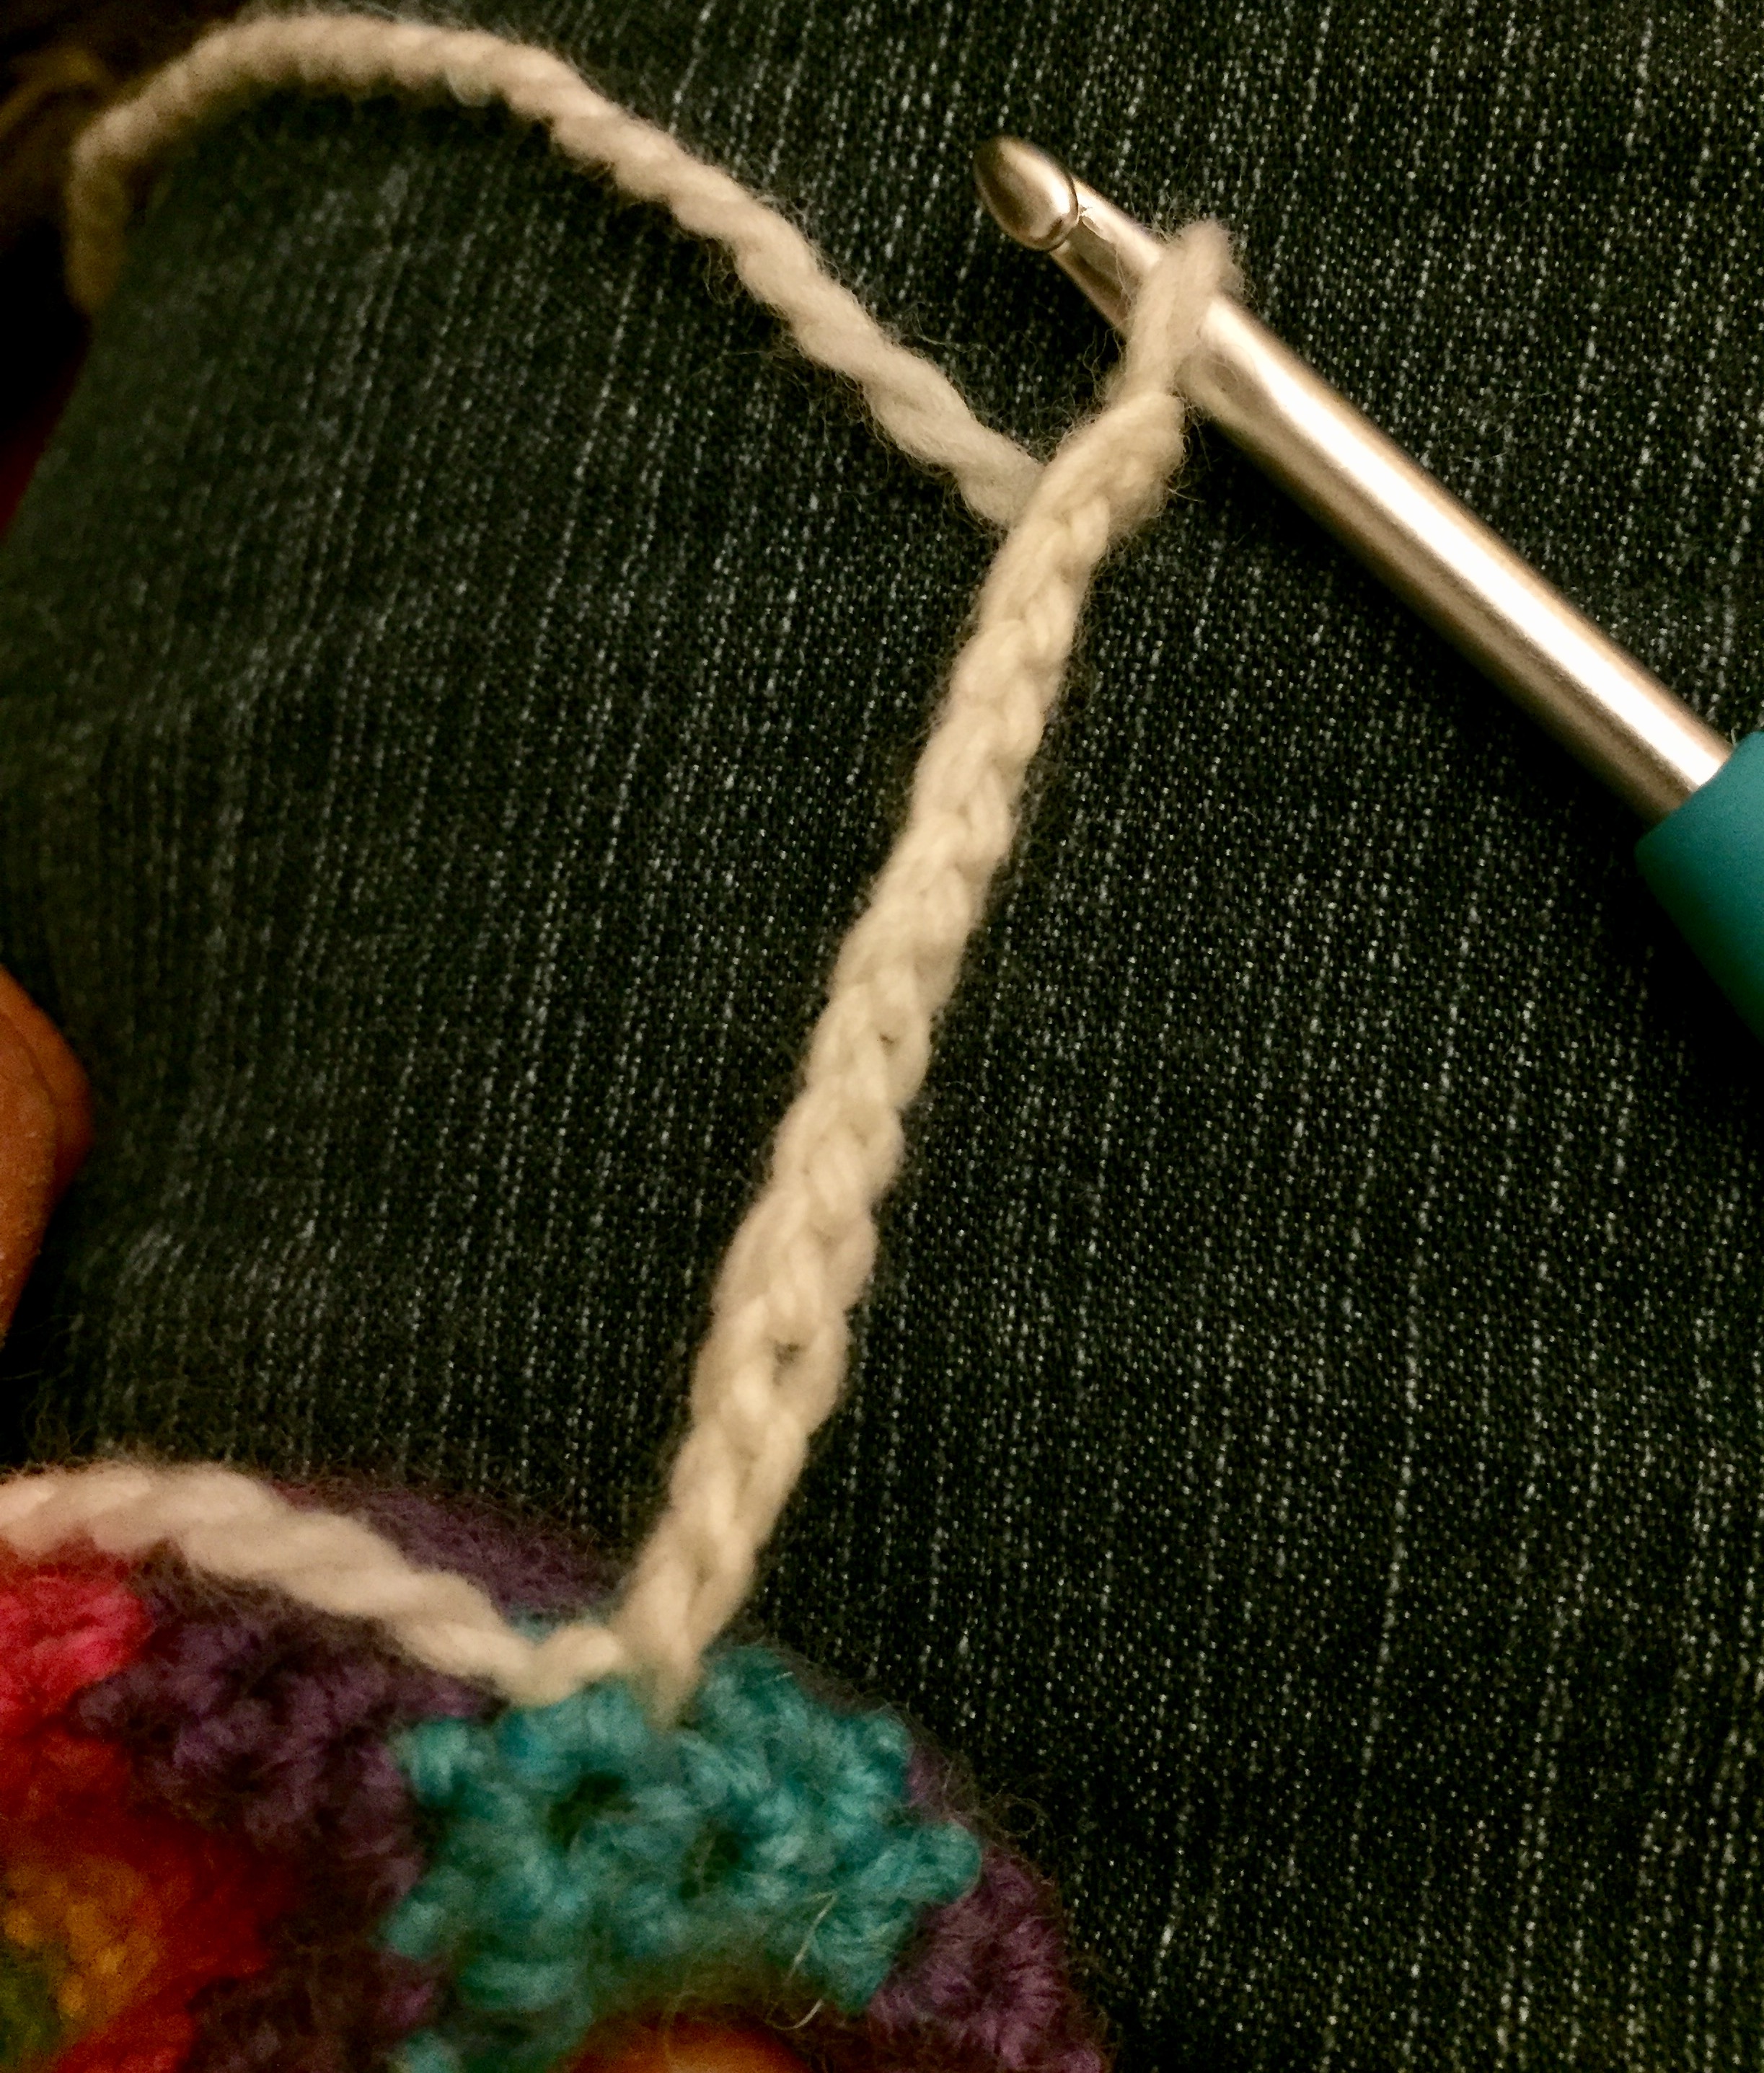
Now that you have sewn it all together, you can crochet the tail.
Tail – make using the main light brown yarn or you could even mix with some cream yarn too.

So first of all, attach your tail yarn, by inserting your hook through one of the stitches in the back. Make a slip knot with your tail yarn and then pull this through with your hook. (Making a slip knot with your tail yarn, will make it quite secure.)

Once you have pulled it through, place your yarn over the hook and pull it through the stitch. This is your first chain. Now chain 19 more.

You now need to attach your chain of 20. So choose the stitch you want to attach it to and insert your hook. Place your yarn over your hook and pull it back through the top of your chains. This makes it into a loop, which gives you your first strand of tail hair. If you clump all your tail hair chains together, it will make a lovely reindeer tail.

Now carry on making and attaching these chains till you feel you have enough. Don’t worry if some of your chains aren’t quite 20 or are more, it will be nice if some of the hair strands are different lengths anyway!

And now for the fun part. The eyes, eyebrows and smile. You need your black yarn, needle and scissors. (Don’t forget you can make the expression anyway you like.)
For the eyes. Attach by knotting one end and threading it through a gap in between a stitch at the back of the body. This will hide the end. Now pull the needle through where you would like the eye to be. I tend to sew over one stitch to make the eye and sew over this stitch about 5 times. You can add eyebrows in the same way but with one stitch.
I love the simpleness of the eyebrows. They can make such a difference to a face!!

For the mouth. Pull the yarn through where you would like the mouth to start then thread back through where you want the mouth to finish.

Now here’s the tricky part. You now need to anchor the mouth in the middle to make it a smile. So simply push the yarn back up in the middle of the mouth by one stitch lower, go over the top of the mouth, then back through the same stitch. This will give you the smile. Again simple, but effective. Here is the same smile being made on Smiles, the little travelling companion.


I wonder if Smiles and Master Rudolf are going to become firm friends in our household. I’m sure they will get up to some mischief!!
Well I hope you have enjoyed my Rudolf post and hopefully enjoy making up your own little reindeer. Don’t forget you can make him in any yarn and weight you wish. Just make sure you get the correct hook size. Can’t wait to see any creations that you make!! Remember to hash tag #pipsrainbow
And may I take this opportunity to wish you a very Merry Christmas!!!
Happy hooking!!
🌈Xx


